
TIPS FOR HANGING A FLOOR-TO-CEILING PHOTO GALLERY WALL
I love a beautiful photo gallery wall; I can’t think of a better way to add a little drama and personalization to your space than a wall full of the faces of those we love. We’ve had one in every house we’ve lived in, but it wasn’t until I saw this hallway in this project by design genius Steven Gambrel, that I got the hankering for a floor-to-ceiling photo wall. I love the drama it brings to our living room, but also because I don’t have a ton of extra surface space to display photos, so this kills two birds with one stone! I posted a sliver of my gallery wall a few weeks back in this post and got a ton of questions about the frames I used and how I hung them, so I thought I’d share my tips here:
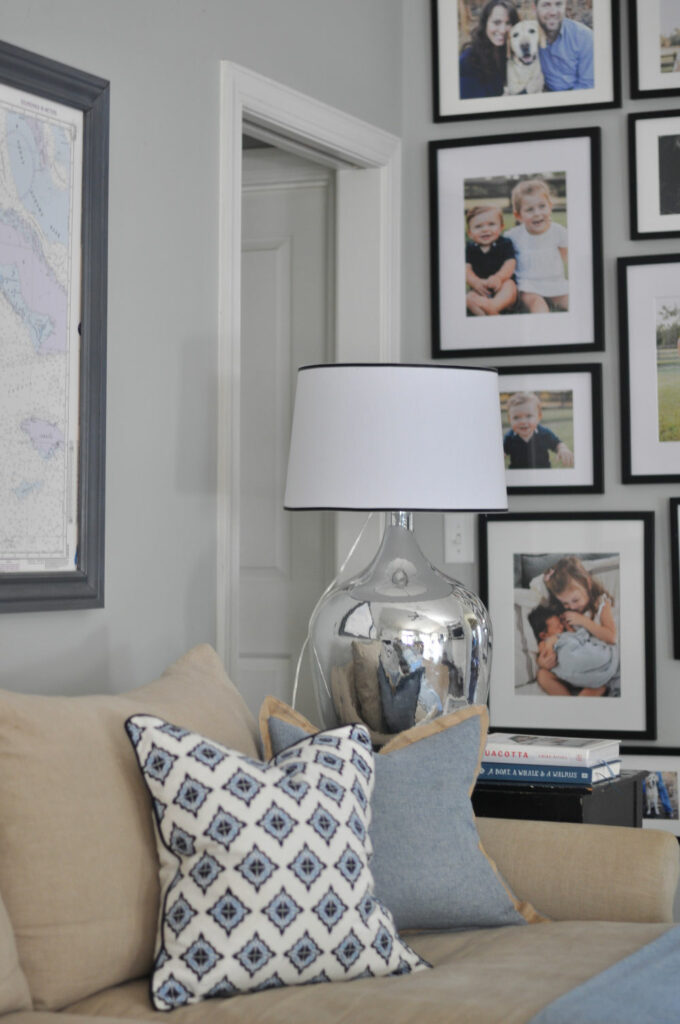
PICK A COLOR PALETTE. This is just a personal preference, but I like to keep the frame style and color all the same, especially when I’m hanging quite a few photos. Keeping the frames the same color and/or style helps draw the eye to the artwork or photos being displayed.
USE DIFFERENT SIZES – AND DON’T BE AFRAID TO GO BIG! For the gallery wall in my living room, I used a mix of 16×20, 11×14 and 8×10 frames. Unless you’re hanging a grid gallery wall, using different sized frames adds depth, dimension and interest! And don’t forget to add some oversize photos for some drama!
HANG PORTRAIT AND LANDSCAPE PHOTOS Another way to add interest and dimension, just by mixing vertical and horizontal photos.
GO FLOOR-TO-CEILING FOR A LITTLE DRAMA Hanging photos from top to bottom is such a great way to add drama, especially on a large expanse of wall.
LAY YOUR PHOTOS OUT ON THE FLOOR Get a better visual and save your walls from a ton of extra unwanted holes by laying your photos out on the floor first until you find a layout you love. Measure out the wall space your gallery wall will take up and then measure the same amount of space on the floor. Lay your photos out within that space until you find the perfect configuration.
TAPE KRAFT PAPER TO THE WALLS Trace your frame sizes on kraft paper, cut them out and use painter’s tape to adhere them to the wall for perfect placement and again, to save your walls from a ton of extra holes!
HANG WITH EYE HOOKS AND PICTURE WIRE I always screw eye hooks into the backs of my frames and string picture wire through them for extra support. I’ve lost a few frames that have fallen and chipped my baseboards in the past, and with kiddos passing by our floor-to-ceiling gallery wall, and sometimes bumping into them, I take no chances now!
DON’T SPLURGE ON FRAMES Another perk of using all the same type of frame is that I can always find simple, inexpensive modern frames in the same style. All of mine came from Hobby Lobby, TJMaxx and Target and were all purchased on sale. And I’ve even spray painted some to match.
Posted in DIY

Hello and welcome to Bungalow Blue Interiors!
I'm Kelly, interior designer, stylist, hostess with the mostest and editor of my blog, where I share pics of my work, my own home, décor projects, entertaining hacks, where to find the best decorating deals and all the beautiful things that are currently inspiring me!