
STEP-BY-STEP GUIDE TO A “ZINC” PAINT FINISH
One of my favorite paint techniques for lamps, mirrors, pots and more is a “zinc” finish – and it also happens to be one of the easiest to do! I have always loved the chalky, blue patina of zinc but it also comes with a hefty price tag, so for me, a paint treatment that can mimic it realistically is the next best thing. I’ve shared this process before on Instagram and even dedicated a post to it here on the blog a few years ago, but, unfortunately, when I switched over my blog a few years back, a lot of posts didn’t make the transfer and so, I’m sharing it again here!
Years ago, I created this finish with a few different metallic paints that were really tough to work with – they dried faster than I could finish applying a full coat and would many times have to end up sanding spots and starting over. Thankfully, I found an easier way of getting a similar look and all you need is spray paint and watered down white paint. Here is how I do it:
CLEAN. Make sure whatever you’re painting – mirror, pots, lamps – are clear of dirt and debris, otherwise, it will prevent you from a smooth finish. I usually wipe my piece down with a lint cloth before I get started, but if the piece is particularly dirty, I’ll clean it with a damp paper towel and then let it dry completely.
TAPE IT OFF. Using painter’s tape, tape off mirrors, glass or the electrical cords (if you’re painting a lamp). I usually skip this step if I’m doing a mirror or picture frame because it’s super easy to use a razor blade to scrape away any paint, but if you’re a novice at painting, you might want to make the effort and tape it off!
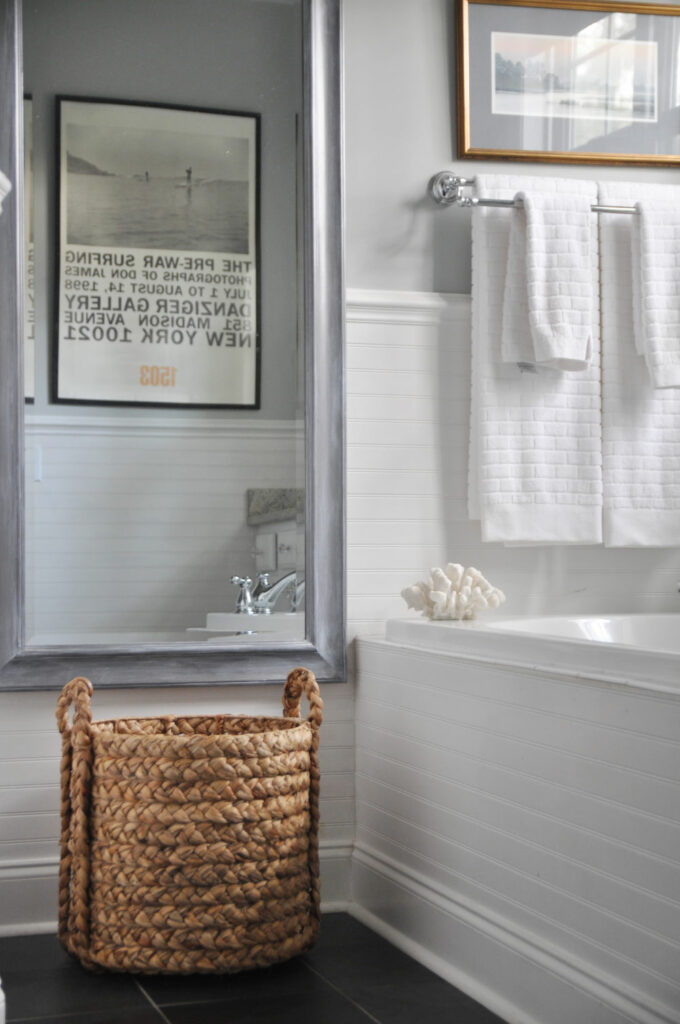
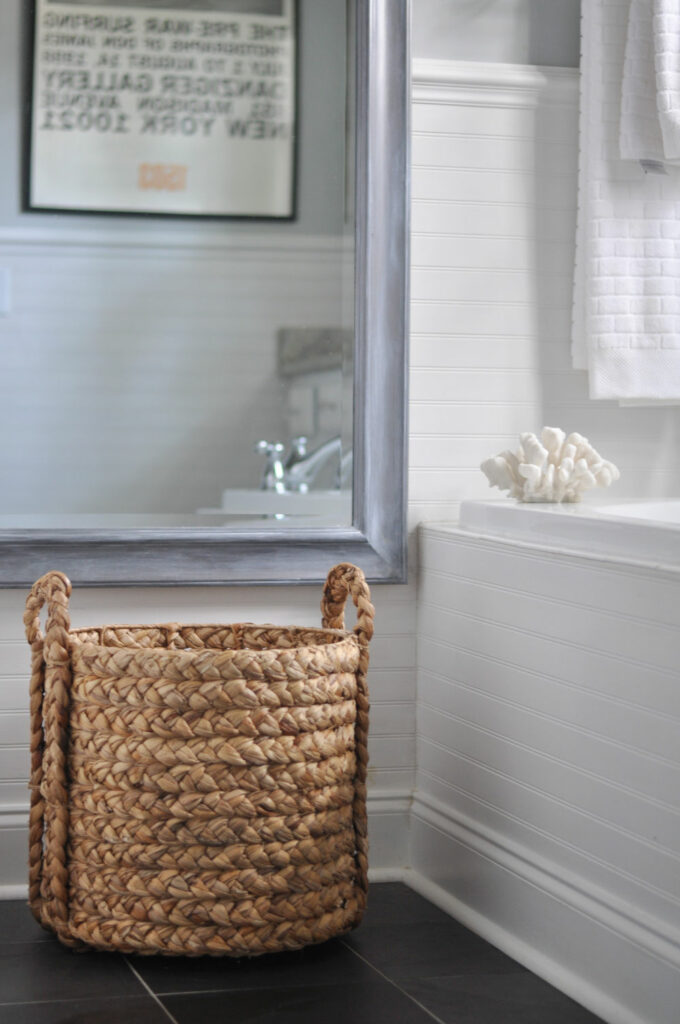
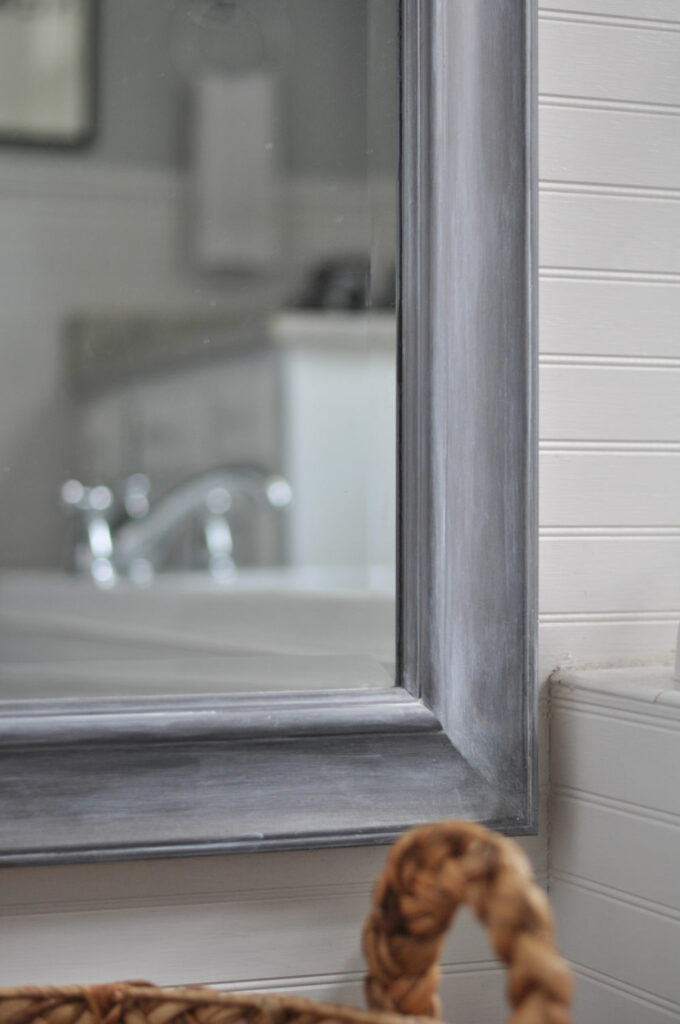
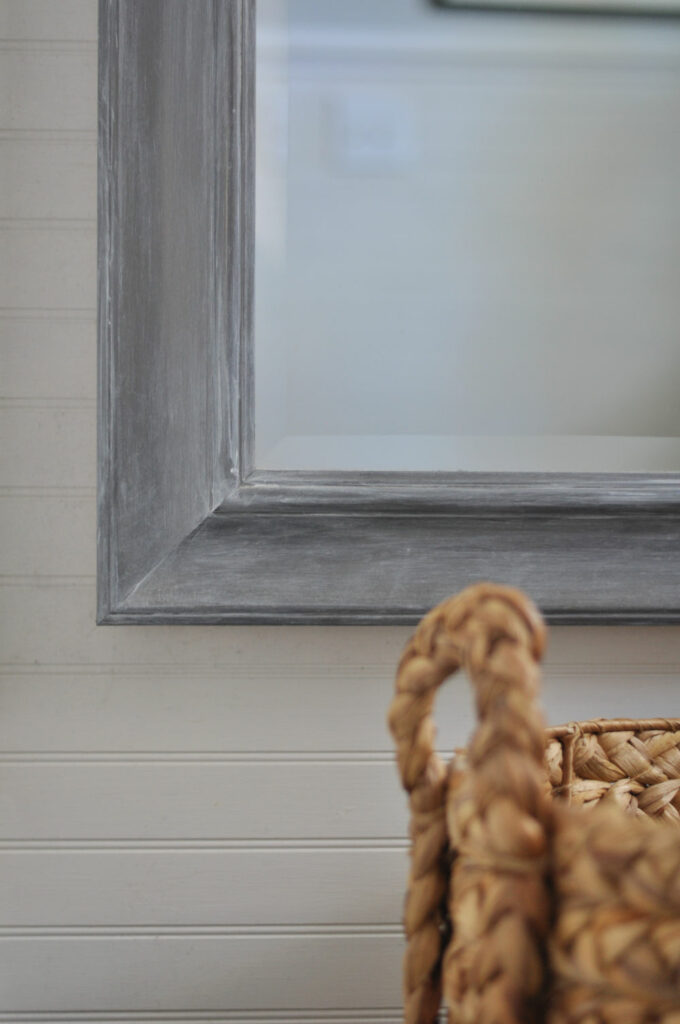
SPRAY A LIGHT FIRST COAT OF RUSTOLEUM IN DARK GRAY. This is, by far, my favorite shade of gray for a zinc finish. I prefer the matte finish because it makes it so much easier to whitewash overtop; true zinc has a chalky finish, so a shiny spray paint just wouldn’t get the same look.
The trick to a great finish when using a can of spray paint is to always, ALWAYS use light coats! As I mentioned in this post, I’d MUCH rather apply three or four light coats than use a heavy hand, which will cause dripping and require me to have to go back and sand it down once it’s dry and start all over!
ALLOW PLENTY OF TIME BETWEEN COATS. If the paint is the slightest bit sticky to the touch, wait until it’s completely dry before applying the next coat.
WHITEWASH. Once your last coat of spray paint is completely dry, you’re ready to make it look like zinc. This is the most important step, but also the most foolproof because you can go over it as many times until you have the look you want!
To whitewash, mix equal parts water and white paint (I used leftover interior latex paint from when I repainted my baseboards). Using a paint brush, paint the watered down mixture on and let it sit for about ten seconds. Don’t worry if it drips! And also, don’t worry about making sure that every single inch of your piece is covered with the whitewash mixture because in real life, zinc does not patina evenly.
After a few seconds, use a tee shirt cloth (I get mine in a pack from Lowe’s) or an old towel and wipe the mixture off. If you were light handed with the whitewashing and want it to have more of a white finish, apply a second coat and wait a little longer, then wipe back again. The finish is just so chalky and beautiful!
Posted in DIY

Hello and welcome to Bungalow Blue Interiors!
I'm Kelly, interior designer, stylist, hostess with the mostest and editor of my blog, where I share pics of my work, my own home, décor projects, entertaining hacks, where to find the best decorating deals and all the beautiful things that are currently inspiring me!